
The team room is a physical place serving as a focal point for all project activities. It is a good practice to have team rooms at the start of projects and always during the end. It’s even better to have the team room throughout the project, but sometimes that’s not possible due to physical constraints. This article enumerates my best practices for a team room setup
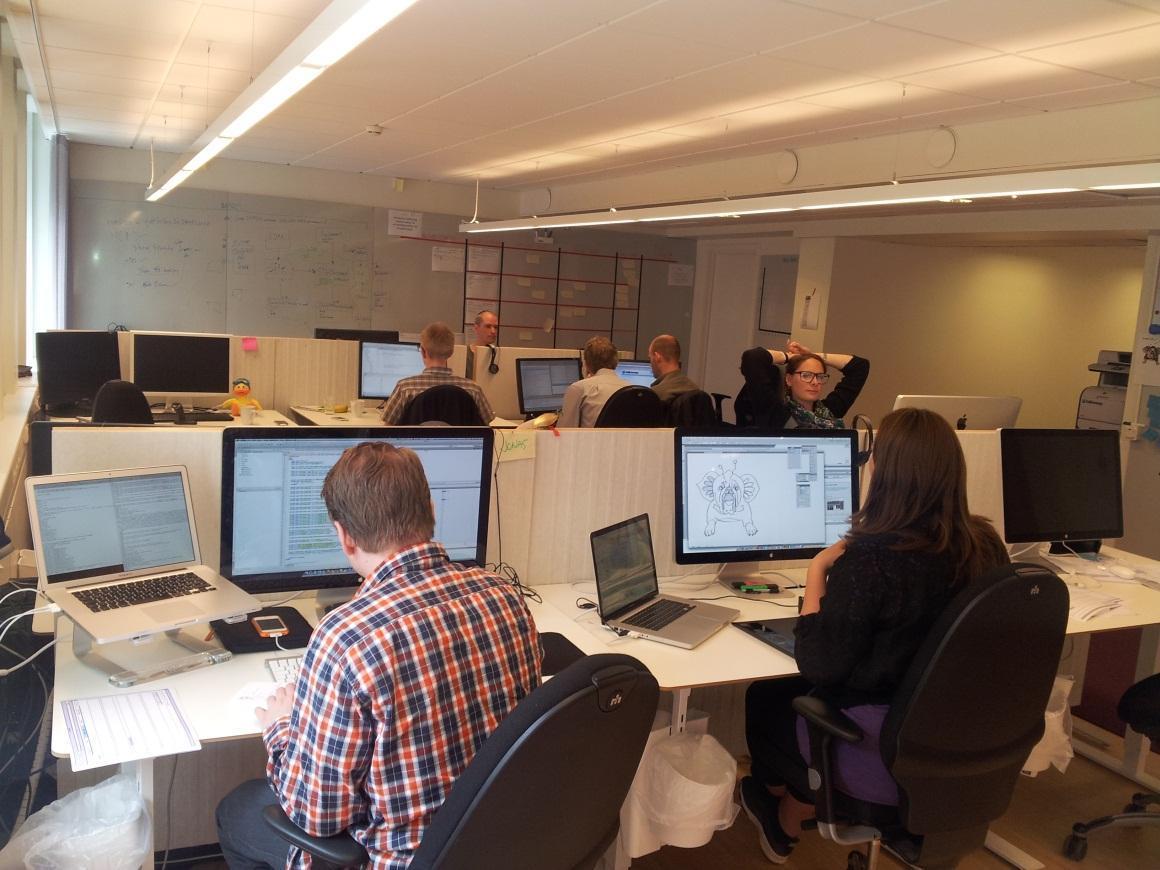
Team room for the Bumblebee project at Bonnier digital, 2012. This document was used from start to end and was a significant factor in the project’s success.
General
The minimum requirement for a team room is to have a physical wall somewhere as a focal point for the project. In a distributed development setup, you should also setup a virtual team room (aka Jira, Rally, Sharepoint, etc.) to make sure information is shared across locations.
The main purpose of a team room is to enable close and effective collaboration and reduce lead time for decisions and actions. By setting up a team room, you can also enforce teambuilding and a culture of openness and rich communication. Some other effects are:
- It encourages moving away from the irony of sending e-mails for every small detail and then waiting for a reply
- It’s the easiest way to see everyone related to the project, in one room.
- Asking a question is as simple as waving at someone.
- It promotes a more open culture and free communication.
- Everyone can see the Product backlog.
- Stakeholders are nearby whenever needed.
- Everyone can see the current stories in development, and the alert signs and cards.
- It becomes the continuous integration server for everyone to access and show the progress of all modules.
Ideally, a team room is an open area that is big enough to fit all project members in working mode, with workstations. If the location only supports cubicles or a non-open environment, project members should be equipped with laptops (not stationary computers) to be able to move around.
Another necessity is the availability of conference rooms with technical equipment for meetings with distributed team members or stakeholders. Smaller private spaces for private calls and brainstorming exercises is a best practice too. (Someday) I would personally like to have a room for my power naps. But as a contractor this is taking trust too far and is not in this version of the team room.
Having experienced a couple of team rooms, I will share with you my best practices about setting up a team room for your project. As usual, I recommend that you don’t go by the book or take the best ideas only… dare to try the crazy ones as well.
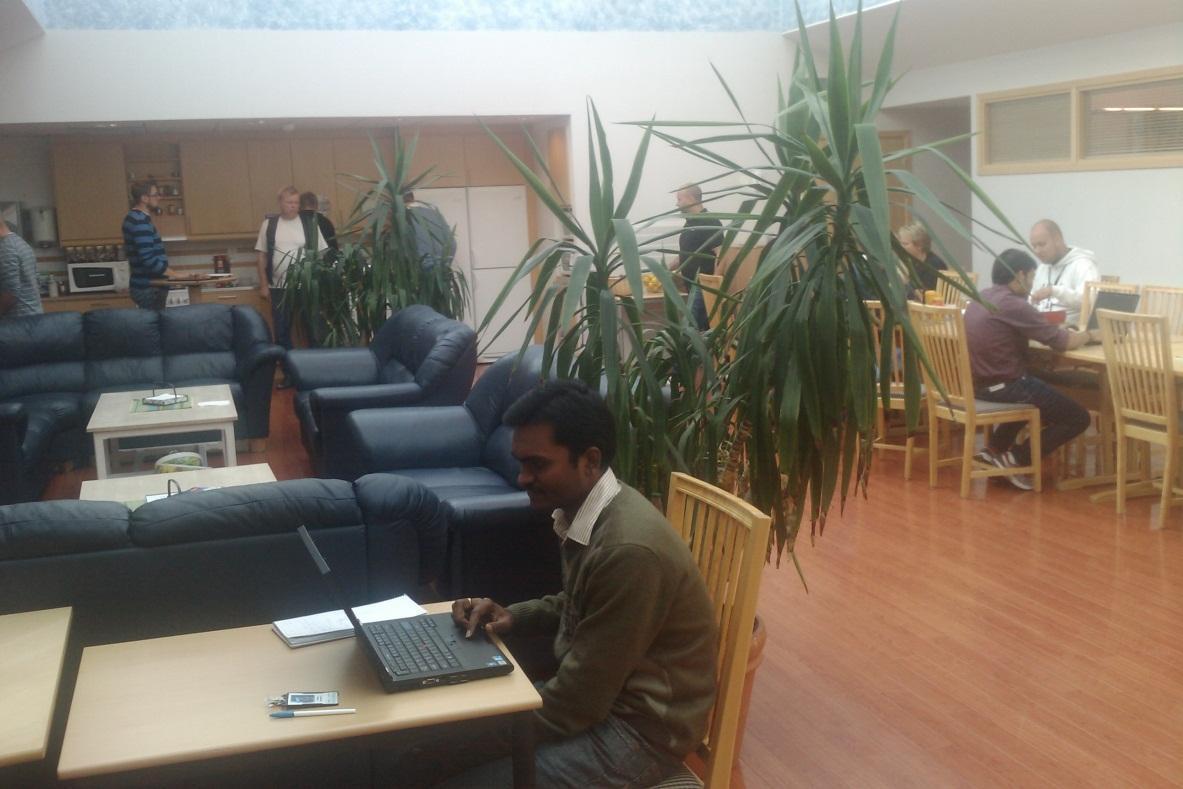
This document has been used to set up several team rooms and you need this document if your current team room looks as bad as this. This was our setup until we transformed it into a team room. Notice the non-ergonomic furniture and the combination with dining/coffee room.
Why a team room?
Always start with why. To understand why you need to set up a team room for your project, you need to understand the principles behind Agile development, which has been around for 12 years now and has become an industry standard for IT projects. What 17 project gurus agreed on in 2001, was called the Agile Manifesto:
“We are uncovering better ways of developing software by doing it and helping others do it. Through this work we have come to value:
· Individuals and interactions over processes and tools
· Working software over comprehensive documentation
· Customer collaboration over contract negotiation
· Responding to change over following a plan
That is, while there is value in the items on the right, we value the items on the left more.”
This is the foundation of Agile and I strongly recommend this to be on the wall for everyone to follow; this principle is proven to leads to more effective projects, if applied with common sense. When you have doubts about applying Agile principles, always check with this list and follow its recommendation. For instance, if you need to improve the way you work with risks in the project, do not configure the tools or/and the processes before you have consulted the people on how to do it. You may be surprised to learn that perhaps you don’t need a process or a tool! Maybe, the need for a tool or process can be handled as part of your daily meeting? Consider processes and tools as ‘waste’ as long as you have good individuals and interactions. If not, apply tools and processes.
The set up process
In a distributed team, you should add a mobile web camera over Skype, panning as much of the team room as possible. Each team should have one camera and during daily meetings, zoom in to the person speaking. Ideally, the camera pans the wall and the person speaking has a fixed spot to stand on. This is hard to maintain but it is worth a try.
It’s a good idea to have a dedicated room or space for demos. This room should contain good (and unfortunately, expensive) devices for videoconferencing and audio. I recommend WebEx for screen sharing, Skype or Google hangout for video and a “non-VOIP” tool (for example, Telia Telemeeting) for audio. This room could also double up as a conference room.
All workstations should be equipped with headsets to be able to work in peace and attend virtual meetings directly from the workstations. However, you must also set ground rule for how and when to use headsets so that natural osmotic communication within the team is not lost.
As a final touch, put up the sign “Team Room for Project XYZ” at the entrance, append basic ground rules and a fun slogan under the sign, and start collaborating.
The Wall
The most important part of the team room is the wall. The purpose of the wall is to visualize your team work and make it the focal point. Make sure the post-its stick to the wall; if not, I suggest you buy plastic wallpaper that post-its stick to.
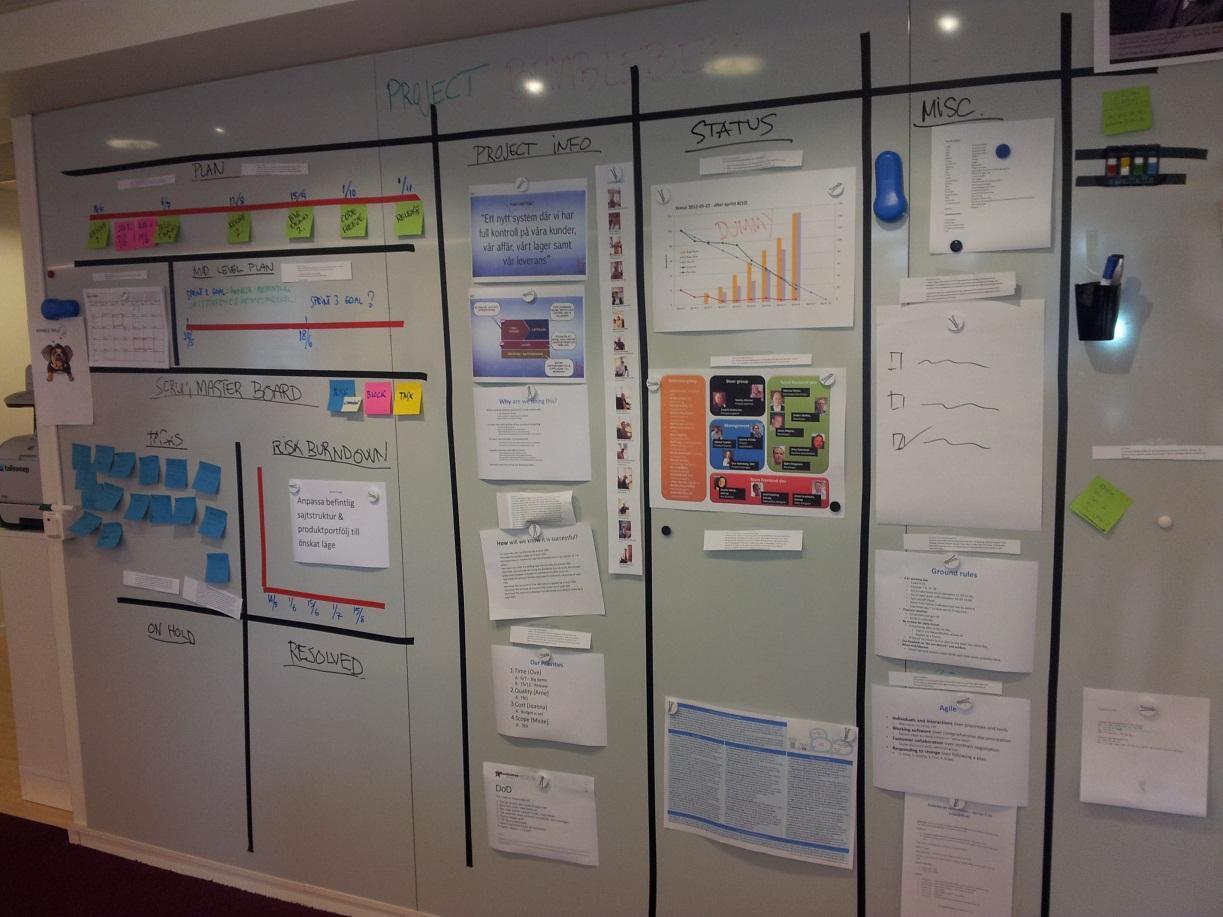
Project wall for the Bumblebeeproject at Bonnier digital, 2012
Regardless of whether your team is co-located or distributed, all teams should have a wall; for distributed teams, a webcam comes in handy for remote teams to visualize all project artifacts. Below are my checklist for stuff to put on the wall.
Org. Chart with Pictures
Let everyone see who is working where in the project and what roles they have. Picture, name, role and Skype-ID are mandatory information that goes here.
Purpose and Vision
Everyone in the project should know this. Typically it is an elevator pitch – two sentences that you can tell a friend and to describe the project.
Business Problem Statement
What is the client’s business and what challenges/possibilities do they see with this project. Why are they doing this? What are their expectations of the product/project and how do we measure success?
High-Level Plan
Spanning from start to end of the project, a high level overview using the client’s preferred process, with milestones. HLP is modified only after steering group meetings.
Mid-Level Plan
The MLP is reviewed at the start iterations. The plan shall span the current + 2 iterations maximum and should end with a milestone. It is based on two graphs:
1. The product backlog burn-down / burn-up chart
2. The three-iteration plan with a goal for each iteration
Low-Level Plan
The LLP is visualized with:
1. The iteration burn-down chart
2. The iteration backlog that is on the wall with post-it for every story/defect/task. You could also have the stories printed on A4 sheets and append the tasks to them as post-its. Each story has its own swimlane and starts with column ongoing and ends with done.
a. The iteration backlog for development should be of type Scrum
b. If in the post-development state (UAT, SIT, and similar) we do not use iterations anymore to be more adaptive to change;in such a situation, we use the Kanban approach and the Kanban board instead.
Next Demo
Put up a poster a couple of days before the demo, if you want the whole company to attend. If you only want core stakeholders, just send it as a PDF to the audience.
Project/Track Status
Be very clear what state the track/project is in. Definitions:
· Red: We will not meet the next milestone and/or we have risks that are red.
· Yellow: We are behind the plan but will be able to catch up.
· Green: Everything is going according to plan and no risks are red.
Mood Board
Before going home each day we all put one X each on a graph where we signal our mood. The mood is the combination of stress and fun. If there’s no stress and a lot of fun we put an X on the top of the board on that day. Next day, we repeat the activity and if we get a negative trend or just one X on the bottom scale the scrum master reacts.
Definition of Done
The DOD is how the product owner and the team define a done story. You could also have characteristics for done iterations, done projects, and done defects. The DOD is written by the team but accepted by the product owner. Please add TDD as the first part of DOD on a story to minimize defects later on and get a better understanding of the requirements. Other stuff like all tasks checked in to repository and set to done in tracker, etc. is optional but often necessary.
Ground Rules/Social Contract
Typically, a sheet with each team’s ground rules. Timekeeping, check-in routines, e-mail handling, meeting discipline, etc. goes here. Also consider not to talk about anything else than work in the team room. If implemented, you must provide an area nearby to have these discussions.
Penalty Sheet
According to the ground rules, we have a system that has been agreed by the team by consensus. I recommend singing as a penalty. Singing has more effect than money and it’s fun but not desirable.
Awards
If you have a penalty sheet you also must balance this with a sheet for awards. The Iteration Hero could be a person that brought a cake or did magic solving a problem for the team. Perhaps a Hall of Fame even?
The Agile Manifesto
If the project is run in an agile fashion we should be open about our core agile values and not use agile as a buzzword. Put the agile manifesto on the wall so we are reminded on how we prioritize these virtues.
Retrospective
I recommend appending a minimum of one improvement per iteration. Improvements are validated and accepted/rejected by the team at the next retrospective meeting. The purpose of the retrospective is not only to improve our processes and work more effectively, but also experiment with new processes and tools. Improvements that are accepted are printed in bold. Improvements that are rejected are printed in strikeout and improvements that are ongoing are in plain text.
Release Plan (for Software Projects)
What is the detailed plan for the release? The closer we get, the more detailed it becomes. Also add a countdown to release.
Weekly E-mail Count
To maximize discussions and minimize e-mail, we can have a graph on how many e-mails flow through the project. Hopefully this goes down over time as an indication that we talk to each other more.
Physical Architecture Diagram (for Delivery Projects)
The architect updates this as soon as it changes.
Impediment Backlog
What problems do we have and how do we avoid them? If we don’t log our problems we will not be able to find out the root cause and we will make the same mistakes over and over again. We also need to prioritize our problem. Should we wait until tomorrow when the problem probably is solved or should we solve the problem ASAP? By keeping track of impediments we can add these to our retrospective meeting and mitigate these if there is a pattern. I suggest plastic wallpaper with the columns New/In progress/Done where Done impediments go into retrospective, New is where you as problem owner put your post-it so that the team leader can prioritize it and solve it. Only the team leader puts problems in In progress state. The impediment backlog is updated every daily meeting at question 3 – What problems do I have?
The Heartbeat (aka Communication Plan)
Keep track of and visualize the recurring events in your project/team. The cycle of time that we call the pulse is probably the same as your iteration length, but can be two or three iteration as well. Mandatory events are the daily meeting, iteration planning, the demo, and the retrospective. Optional are preplanning, spike, teambuilding, review, etc. The purpose of the pulse is to be pleasantly predictable in the project and to allocate resources (not people, but conference rooms, tools, etc.) needed for the events, in advance.
Birthday Calendar
Keep track of birthdays and make the celebrant bake a cake for all. Buy a calendar with nice pictures or create your own by just printing out an empty calendar from Outlook. Add at least one “celebration” to the calendar each month.
Priority Slider with Metrics
Quality, scope, time, and cost are the four usual dimensions of how we measure and prioritize our projects. But we can also add agile dimensions such as value, tools, processes, and people. In the start-up phase of a project, core stakeholders will prioritize these dimensions and put metrics against them. The team keeps these priorities and metrics on the wall as a reminder of how the project shall be executed.
Metrics
Metrics is data to be able to follow up on our overall project/team goals. For instance, stakeholder satisfaction according to expectations, lines of code, technical debt , completed tests, test coverage, team improvement, velocity, performance, etc.
Explanatory Comment (not to be pasted on the wall): Some people think this is valuable. I think it is counter-productive and waste; but this is my opinion and not the general one. When I act as the product owner, I always go for one metric and that’s the ‘hit rate’. A 100% hit rate means that the team is demoing all stories that they have committed to – nothing more, nothing less. A good hit rate is achieving between 95-105% over all iterations. The first iterations always are way below 100% and that’s OK as long as the second iteration is not the same. Two iterations with a bad hit rate is (for me) a red project. Bear in mind that I do not fancy that you deliver more than you have estimated. For me, it symbolizes bad understanding of the complexity of the project and a bad team. So I’d rather see you being predictably pleasant (good hit rate) than unpredictably pleasant (above and beyond expectations).
Creative Design Suggestions
These designs visualize the final product and should be up on the wall so we can keep them in mind when we are under the hood.
Risk Log
Often, risk management is done in an online tool, but too often this is a good way of hiding the risks and just for keeping your back free. When shit hits the fan you can address the log and call out “didn’t I say so?” If you visualize the risks on a wall you will have them in your face daily and you will start to question risks that don’t move from the high severity area. Use two axis – Impact and Probability. If a post-it is placed on the top right part of the risk log you must mitigate it ASAP.
Summary
This is my wish list for a successful team room. Just like all wish lists, it comes with a lot of disappointment. But please start with a few of these practices and implement at least one each iteration and so on.
For a remote team, it is important to adapt to the processes and tools of the co-located team and vice versa so that they both have the same prerequisites. When both teams have the same information, they all feel “at home” regardless of where each is physically located. You can easily swap team members between the teams – something that is highly recommended for bridging the communication and cultural gap. So please copy the setup in all your teams but also remember that each team has its own autonomy and needs to decide for itself. Do not enforce stuff. Make the team desire the team room and its setup.
Last but not least, give the room a name that promotes creativity and spirit and put up a sign – what about Home Ground of Team ‘Creators’.

Håller du med? Eller inte? Diskutera här…